|
1) Open Internet Mail
2) Select Mail and Options
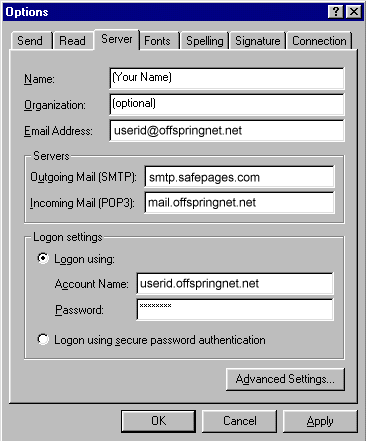
3) Click on the Server tab
4) Enter your information as shown below.
Note: password is echoed as asterisks. Passwords are case-sensitive
so be sure and enter your password carefully. Your email password
is the same as your FTP password.

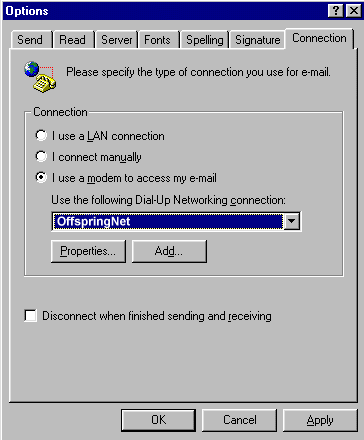
5) Click on the Connection tab
6) Make sure I use a modem to access my e-mail is selected
and that the Dial-Up Networking connection associated with
your customers account appears in the box. If it does not, click
on the arrow and select your connection.
Note: during your setup, you may have selected a different name
for your connection (i.e. "My Connection", "Home", "Connection to
3360777", etc.). Select the connection name associated with your
account.

7) Click Apply and OK to save your settings.
You are now ready to begin sending and receiving email with Internet
Mail. For advanced program features and instructions, consult Internet
Mail's "Help" files or contact Microsoft Support Online at: http://www.microsoft.com/Support/
|


